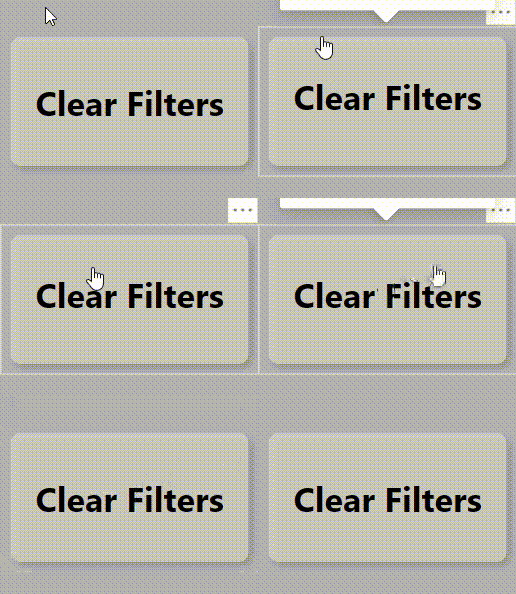
In this article, we show you how to create a button to clear all filters with one click in Power BI.
There are two methods to achieve this.
The first method has been made available recently from a Power BI update and is a very simple way to add a button to clear all filters.
The second method allows for customization with your button, for example, if you want to clear some filters with one click or clear all filters as well as other visuals at the same time.
We have also created a YouTube video that goes over both methods if you prefer to watch the tutorial:
Method 1: Use ‘Clear all slicers’ button
There is now an easier way to clear all filters in your Power BI report with one click.
In a recent Power BI update, an option to add a button to clear all slicers has been added.
This works in the same way to the second method we share in this article, by returning slicers to their default state.
It is very easy to add this ‘clear all slicers’ button to your Power BI report.
Simply go to ‘Insert’ on the top ribbon, click ‘Buttons’ and an option of ‘Clear all slicers’ should be available.

This will add a button that will clear all your slicers. The button can be customized like any other.
However, if you want your button to do anything other than clearing all slicers, i.e. clearing some but not others, or clearing slicers but leaving certain visuals highlighted, etc, then this second method will allow you to create buttons for that.
Method 2: Use a bookmark and custom button
Step 1: Create and name your bookmark
The first step is to create a bookmark. If you do not have your bookmarks pane open in Power BI, go to ‘View’ on the top ribbon and choose Bookmarks.
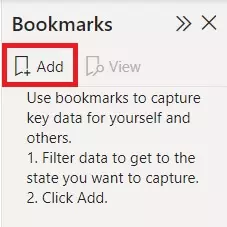
Then in the bookmarks pane, click ‘Add’ as shown below.
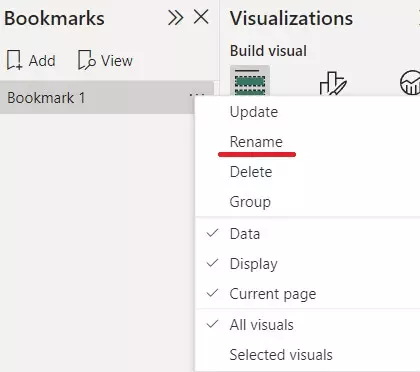
Next, click on the ellipsis and rename your bookmark with an appropriate name.
In this example we are creating one to clear all filters, so we will call it ClearFilters.
Step 2: Configure bookmark settings
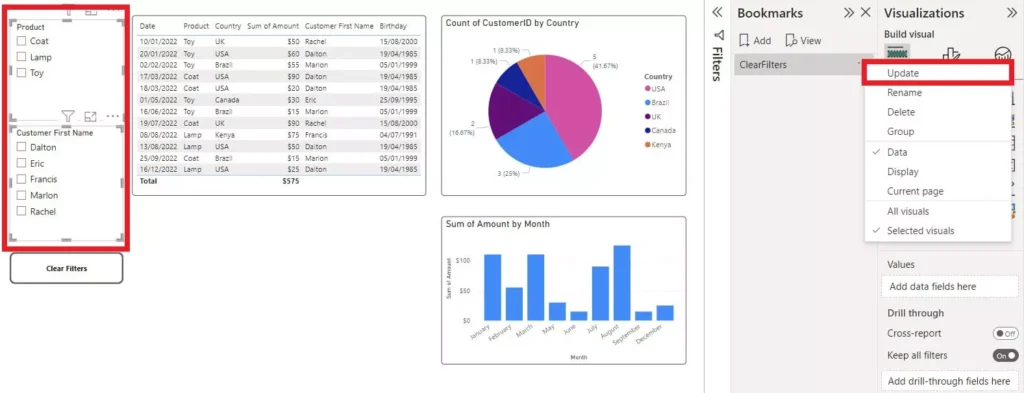
Next, configure your bookmark settings to have only ‘Data’ and ‘Selected visuals’ selected as shown below.
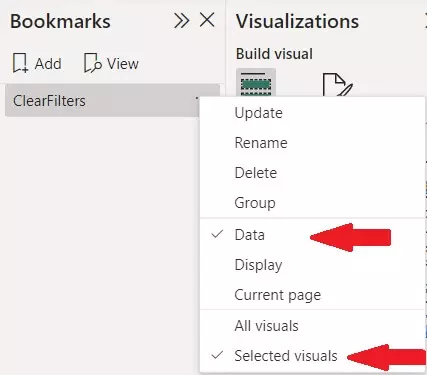
We don’t want to capture the Display from when the bookmark was created, and only the selected visuals since we are only interested in the slicers.
Step 3: Select your slicers and update
Now, choose the visuals that you want to control with the bookmark.
For our clear filters bookmark, it is important that nothing is selected in our slicers.
Once you have selected them, click on the Bookmark settings and click ‘Update’ as shown below.
The bookmark will now return the visuals you selected to the state they were in when you updated the bookmark.
If you want your bookmark to only clear certain slicers, then only choose these slicers when updating.
If you want to include other visuals in the bookmark, make sure these are selected when you update.
Step 4: Add a button and action
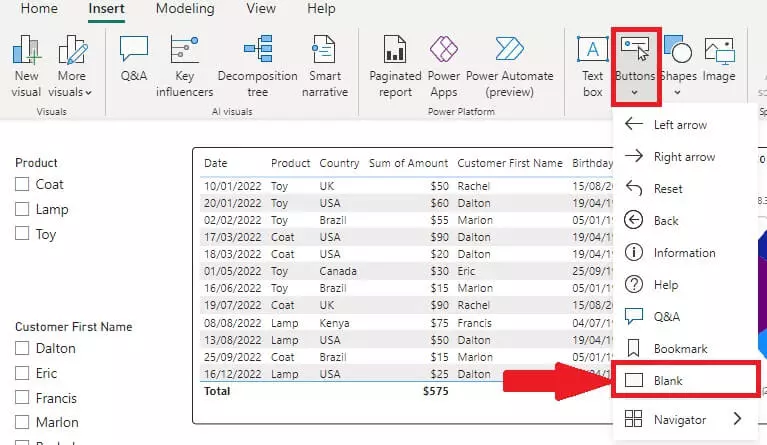
Next we need to create a button that will perform the bookmark action.
Go to Insert on the top ribbon, choose Buttons and Blank.
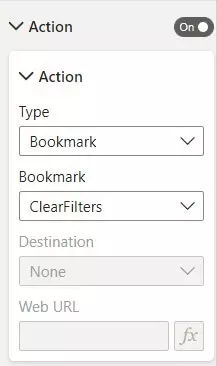
Then, in the button settings, under Action, choose the bookmark you have just created, as below.
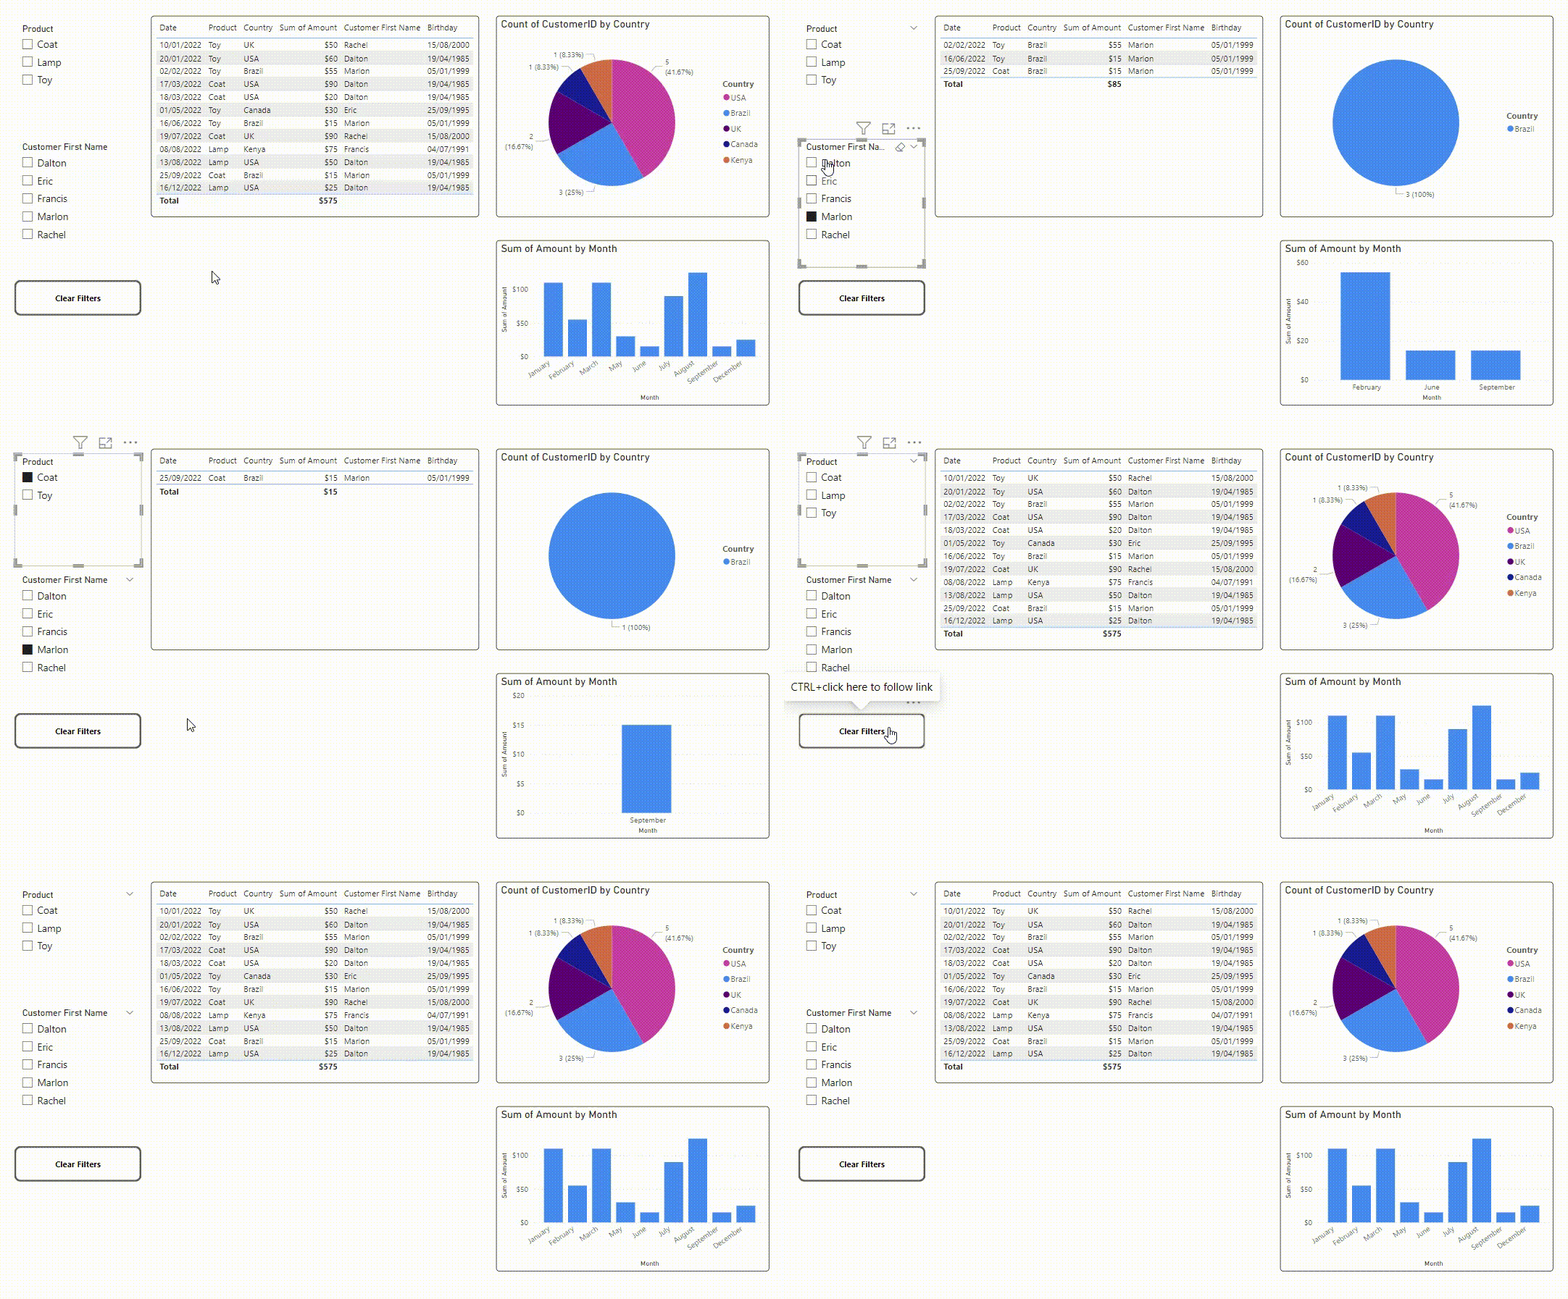
The button we have created will now return the slicers we selected to their original state, as below.
This is how we create a button to clear all filters in one click.
Step 5: Design your button
Lastly, you can then customize your button since the default option is not very aesthetically pleasing.
We like to change the color options, the border and change some settings for the hover state of the button.
